Fitting physical TrackPoint buttons to a Lenovo ThinkPad T440s
Like many ThinkPad users, I use the TrackPoint pointing stick almost exclusively. In November 2013 I purchased a new ThinkPad T440s, this had the new clickpad design where the physical TrackPoint buttons had been replaced with software emulated buttons on the clickpad itself. Not only is this a total pain to get working in software, it has several serious flaws that make using it a very frustrating experience – Namely the fact that there was no way to tell which button you were pressing leading to frequent mistakes.
When Lenovo announced the new series of ThinkPads (Incuding the T450s) I was extremely happy to see that they had brought the physical buttons back, this however left me with a dialemma – I really wanted the buttons but other than that, there was really no major benefit over my T440s to warrant spending that much money on a replacement machine.
I then went hunting around on eBay and came across this auction – THINKPAD T440P T440S T440 T450S Touchpad Clickpad With Left and Right three keys. While it is not an official part (or at least as far as I can tell) it seemed worth a go for that price, especially if it would stop me from inevitably spending £1200+ on a T450s! A week or so after ordering it, it finally arrived and I can happily report that it works!
I’ll now attempt to explain how I set everything up, bear in mind that my attempts to get it working were totally undocumented so I may have forgotten some of the steps that I did.
Hardware Installation
Fitting the touchpad was not that bad but it did require quite a bit of time and patience. In order to do it you need to remove the base of the laptop, the SSD/HDD, internal battery and then remove all screws from the motherboard, this should let you pivot the board just enough to access a pair of screws holding the touchpad in. You should also remove the keyboard as this has two cables to the motherboard that risk getting damaged when pivoting the board. Once you have access to the 4 screws holding the touchpad in it’s a simple case of removing them, unplugging the touchpad from the motherboard, transferring the ribbon cable to the new touchpad and then reversing the steps to fit the new touchpad into the system.
Software Setup
On my T440s I run a dual boot between Windows 8 and Arch Linux, both of these needed to be configured to work with the new touchpad. This is a very rough guide but hopefully will help.
Windows
In order to make it work under Windows you first need to remove the original ultranav drivers. After this you will start using the default Windows drivers in which all buttons work but you cannot use the middle button scrolling. I was able to rectify this by installing the following drivers from Lenovo: n10gx25w. This then gives the option for middle button scrolling in control panel. Of course newer/older versions of the driver may work, I’ve just not tested them.
Linux
This is based on Arch Linux, other distros may vary. Linux support was not nearly as bad as I was expecting. At first when I booted I was worried; the left button would scroll up and the right button would scroll down, this is of course not what is meant to happen. I was able to solve this by creating a file at /etc/modprobe.d/psmouse.conf containing the single line:
options psmouse proto=imps
After rebooting the buttons would now work as expected, I then needed to set up middle button scrolling. To do this I created a file at /etc/X11/xorg.conf.d/90-evdev.conf with the contents:
Section "InputClass"
 Identifier "Touchpad/TrackPoint"
 MatchProduct "PS/2 Synaptics TouchPad"
 MatchDriver "evdev"
 Option "EmulateWheel" "1"
 Option "EmulateWheelButton" "2"
 Option "Emulate3Buttons" "0"
 Option "XAxisMapping" "6 7"
 Option "YAxisMapping" "4 5"
EndSection
This file is also where you can set up additional options for how the touchpad/trackpoint performs.
Although it didn’t seem to make much difference, I also installed xf86-input-evdev-trackpoint from the AUR. This didn’t appear to make much difference but is worth trying if you have issues.
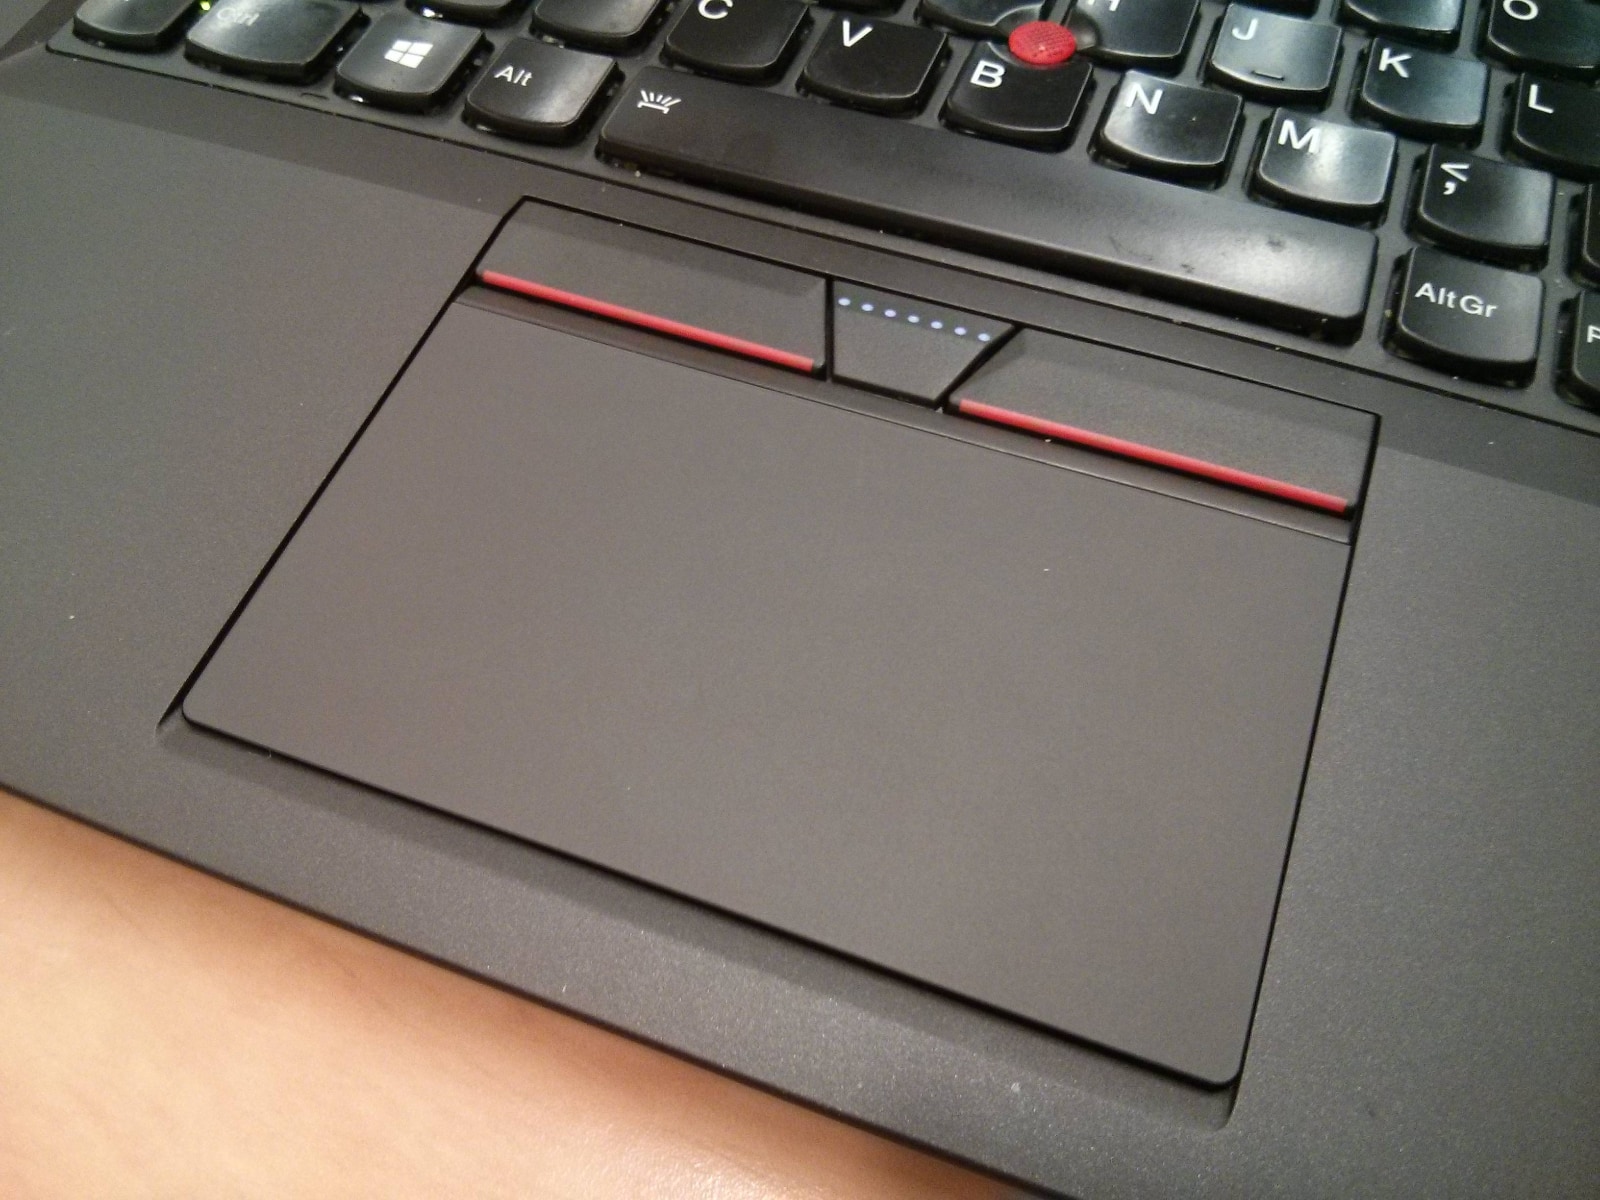
How does it feel?
In one word, fantastic! The new part feels very good quality, the buttons are nice and tactile without being too loud and are shaped perfectly to avoid accidentally pressing the wrong ones. The touchpad is hinged at the top and clicks at the bottom like a MacBook and unlike the old one that could be clicked anywhere. This makes the touchpad a lot quieter to us and it has much less travel distance.
Getting more help
Because this is brand new hardware, there is very little information online about how to make it work, I found out that a lot of people are discussing the touchpad on the 3rd generation X1 carbon, especially with respect to making it work under Linux, therefore if you have issues, it’s worth seeing if someone with the 3rd gen X1 carbon has solved it.